| Raspberry Pi Camera Autofocus: Complete Guide (V1, V2 & HQ) | 您所在的位置:网站首页 › 第34章 恶名远播小说 › Raspberry Pi Camera Autofocus: Complete Guide (V1, V2 & HQ) |
Raspberry Pi Camera Autofocus: Complete Guide (V1, V2 & HQ)
|
This article explains everything you need to know about the Raspberry Pi camera autofocus. It applies to all Raspberry Pi Models, and all Raspberry Pi camera modules: V1.3, V2.1, HQ, and V3. Luckily, you are in the right place. Arducam has the most extensive solution to autofocus on Pi cameras. So let’s dive right in and clarify this issue once and for all. Prerequisites for autofocusHere is the definition of autofocus from Wikipedia: An autofocus (or AF) optical system uses a sensor, a control system, and a motor to focus on an automatically or manually selected point or area.Tweet Easily, we get all the answers we need. Here are the 3 prerequisites for autofocus: SensorFocus motorControl system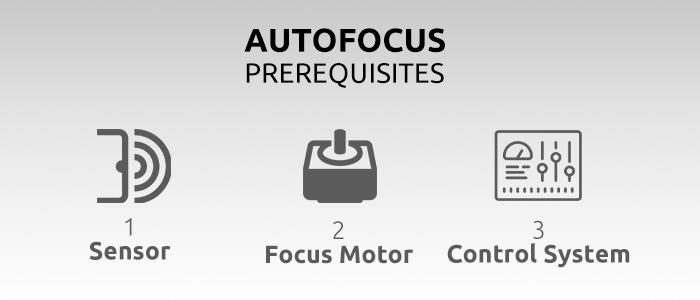 Sensor, focus motor, and control system are the 3 prerequisites of autofocus Sensor, focus motor, and control system are the 3 prerequisites of autofocusTo focus is to move the lens. To autofocus is to automatically move the lens. The focus motor is the “what” to move the lens, and the control system is the “how” to move the lens. When we focus manually, our hands function like the focus motor, and our brain functions like the control system. Therefore, autofocus does not mean no focusing process is involved. It’s just that the focus motor and the control system take over the job for your hand and your brain. Well, do the Raspberry Pi cameras meet these prerequisites? Do the official Raspberry Pi cameras meet all autofocus prerequisites?For now, only the Camera Module 3 series has autofocus. Let’s go over the prerequisites list again and see how the official Raspberry Pi cameras match. Sensor – Yes. They have CMOS image sensors.Focus motor – The V1.3 is glued and fixed. The V2 and HQ need manual work. All V3 cameras come with autofocus lenses, so yes.Control system – Only the V3 series.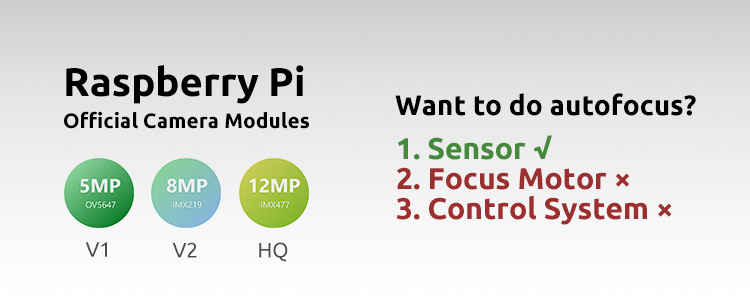 raspberry pi camera V1, V2 and HQ only meet 1 of the 3 prerequisites, so it won’t do autofocus raspberry pi camera V1, V2 and HQ only meet 1 of the 3 prerequisites, so it won’t do autofocusThe first 3 official Raspberry Pi cameras are not designed with autofocus in mind, instead, they just meet the basic needs. The idea of the basic needs goes like this: You can get a clear picture with manual focus. The focus motors and control system not only add to the complexity but also add to the cost. Not everyone needs that. No need to meet all autofocus prerequisites. Does this mean the official Pi cameras can’t do autofocus? Yes. The first 3 official Raspberry Pi camera modules (V1/V2/HQ) cannot do autofocus themselves, period. Does this mean there is no hope for Pi cameras to do autofocus? Absolutely not. Arducam has fixed the issue and made it possible. How does Arducam meet the Raspberry Pi Camera Autofocus prerequisites?The logic to fix the issues is simple: For those Pi cameras that don’t have a focus motor and a control system, then we build variants that do. Let’s break down the two unmet prerequisites one by one. 1. Add Focus motor to the Pi cameraFirst, it’s the focus motor. Let’s consider the focus motor a part of the lens assembly. In case you don’t know, there are two kinds of lens assembly in Raspberry Pi cameras: The V1 and V2 have sealed the lens assembly and the image sensor in one package, then connected to the camera PCB with a board-to-board (BTB) connector. This design is also known as Compact Camera Modules (CCM), and it’s the kind used in smartphones.The HQ camera has a dedicated lens mount. Instead of having the image sensor in one package as the lens assembly, the IMX477 image sensor of the HQ camera is on the camera PCB.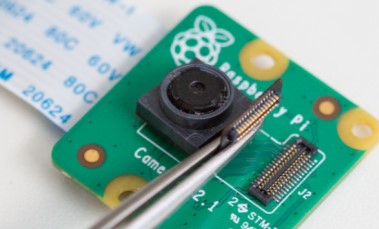 The detachable compact camera module on Raspberry Pi Camera Module V2 The detachable compact camera module on Raspberry Pi Camera Module V2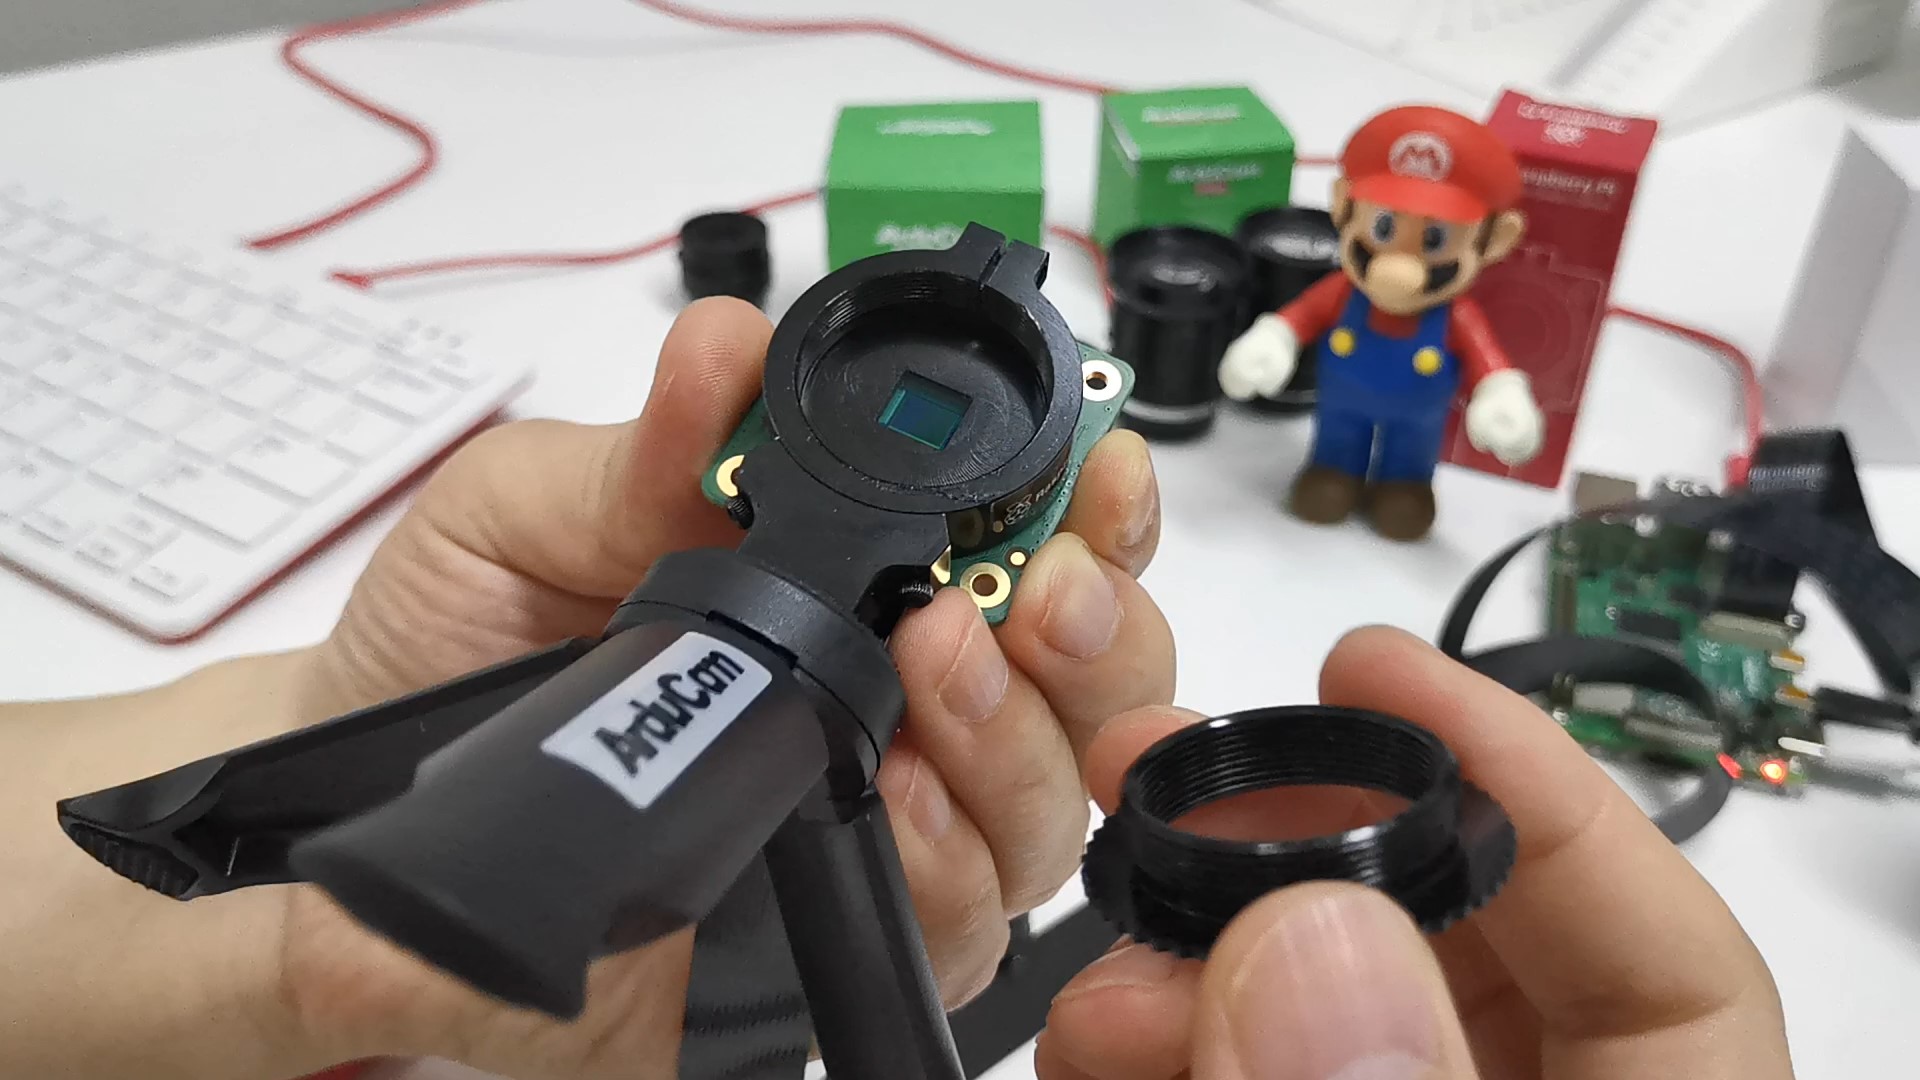 The Raspberry Pi High Quality Camera has the image sensor on the camera PCB The Raspberry Pi High Quality Camera has the image sensor on the camera PCBThis leads us to two methods to design a Pi camera that support autofocus: We build a CCM with a focus motor inside, and then connect it to the Raspberry Pi Camera PCB.We build a special lens assembly with a focus motor and mount it above the image sensor onboard.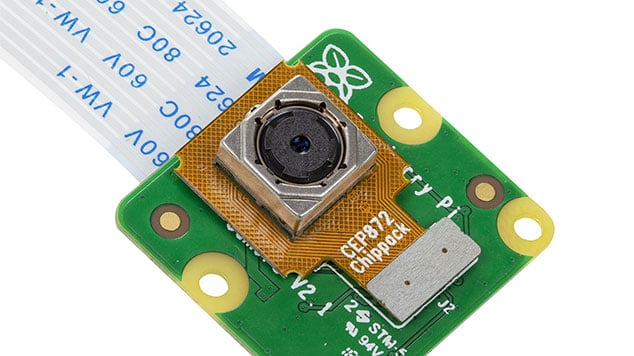 CCM Autofocus replacement on the official V2 Camera Board CCM Autofocus replacement on the official V2 Camera Board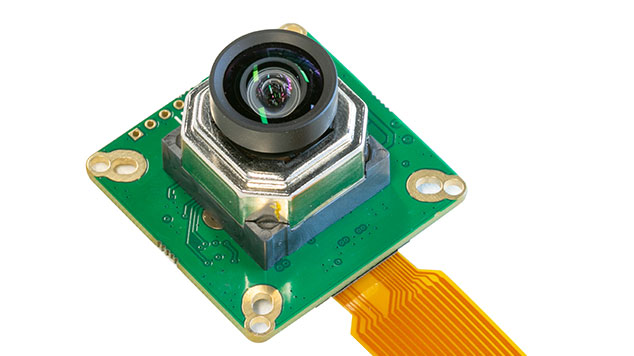 Special Autofocus lens assembly on Arducam’s own variants of IMX477 Camera Board2. Add Control system (so the Pi can control the focus motor) Special Autofocus lens assembly on Arducam’s own variants of IMX477 Camera Board2. Add Control system (so the Pi can control the focus motor)Second, it’s the control system. The Raspberry Pi should be able to control the focus motor. Let’s consider how the Raspberry Pi is connected to the focus motor before we set up the connection: Raspberry Pi →→ RPi MIPI CSI connector →→ Camera Ribbon Cable →→ Camera Module MIPI CSI Connector →→ Camera Board →→ Focus Motor.From above, we know that the key physical connection is the MIPI CSI camera ribbon cable. If so, do we have anything on the MIPI CSI connection that can help us control the motor? I2C bus. More specifically, the I2C for the VideoCore processor. i2c_vc Set to “on” to enable the i2c interface, usually reserved for the VideoCore processor (default “off”). 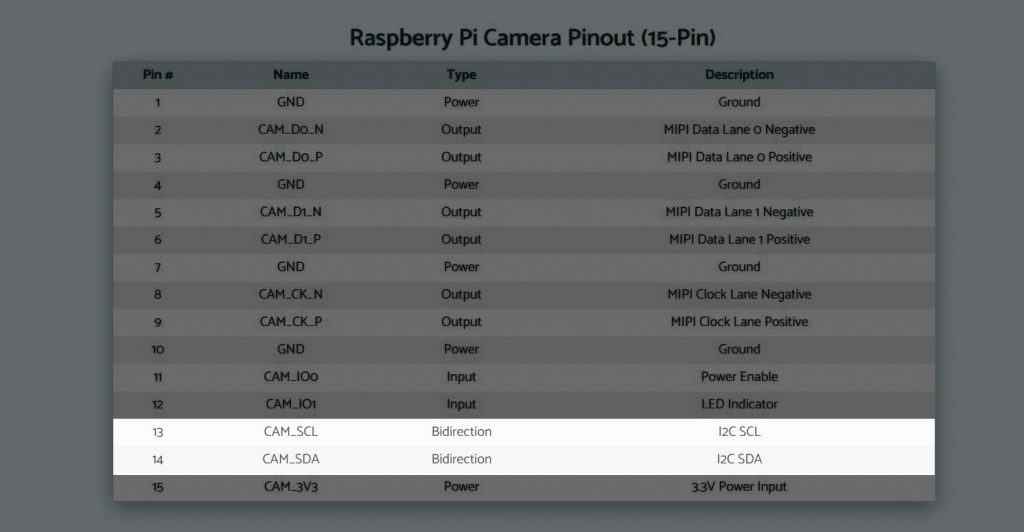 I2C in raspberry pi camera pinout, useful for controlling the focus motor I2C in raspberry pi camera pinout, useful for controlling the focus motorSo, we use the i2c_vc to control the motor. What we need to do is to add the following line to the /boot/config.txt. dtparam=i2c_vc=onNow that we’ve met the prerequisites, what else is needed? How to enable the autofocus feature once we’re ready?The last thing to do is to automate the focus process with a program. Step 1: Software-controlled motorized focusLet’s first get the motors moving. With a simple python program, we can use the keyboard keys to move the focus motor. If you are interested in how we’ve done that, here is the python code for software motorized focus control. Software motorized focus Python codeimport os import time import sys import threading import pygame,sys from pygame.locals import * from time import ctime, sleep pygame.init() screen=pygame.display.set_mode((320,240),0,32) pygame.key.set_repeat(100) def runFocus(func): temp_val = 512 while True: for event in pygame.event.get(): if event.type ==KEYDOWN: print temp_val if event.key == K_UP: print 'UP' if temp_val < 1000: temp_val += 10 else: temp_val = temp_val value = (temp_val8)&0x3f dat2 = value & 0xf0 os.system("i2cset -y 0 0x0c %d %d" % (dat1,dat2)) elif event.key==K_DOWN: print 'DOWN' if temp_val 8) & 0x3f data2 = value & 0xf0 # time.sleep(0.5) print("focus value: {}".format(val)) # bus.write_byte_data(0x0c,data1,data2) os.system("i2cset -y 0 0x0c %d %d" % (data1,data2)) def sobel(img): img_gray = cv2.cvtColor(img,cv2.COLOR_RGB2GRAY) img_sobel = cv2.Sobel(img_gray,cv2.CV_16U,1,1) return cv2.mean(img_sobel)[0] def laplacian(img): img_gray = cv2.cvtColor(img,cv2.COLOR_RGB2GRAY) img_sobel = cv2.Laplacian(img_gray,cv2.CV_16U) return cv2.mean(img_sobel)[0] def calculation(camera): rawCapture = PiRGBArray(camera) camera.capture(rawCapture,format="bgr", use_video_port=True) image = rawCapture.array rawCapture.truncate(0) return laplacian(image) if __name__ == "__main__": #open camera camera = picamera.PiCamera() #camera.awb_gains=4 #camera.exposure_mode='off' #camera.awb_mode='fluorescent' #open camera preview camera.start_preview() #set camera resolution to 640x480(Small resolution for faster speeds.) camera.resolution = (640, 480) time.sleep(0.1) print("Start focusing") max_index = 10 max_value = 0.0 last_value = 0.0 dec_count = 0 focal_distance = 10 while True: #Adjust focus focusing(focal_distance) #Take image and calculate image clarity val = calculation(camera) #Find the maximum image clarity if val > max_value: max_index = focal_distance max_value = val #If the image clarity starts to decrease if val < last_value: dec_count += 1 else: dec_count = 0 #Image clarity is reduced by six consecutive frames if dec_count > 6: break last_value = val #Increase the focal distance focal_distance += 15 if focal_distance > 1000: break #Adjust focus to the best focusing(max_index) time.sleep(1) #set camera resolution to 2592x1944 camera.resolution = (1920,1080) #save image to file. camera.capture("test.jpg") print("max index = %d,max value = %lf" % (max_index,max_value)) #while True: # time.sleep(1) camera.stop_preview() camera.close()Next Level: Raspberry Pi Camera Autofocus with PTZ (Pan-tilt-zoom) camerasNow that we’ve understood the camera I2C can be used as a control signal to move the lens, we can take it even further. If to focus is to move the lens, then to zoom is to move the elements inside the lens. We want to control not only the lens but also the elements inside the lens: we can have an autofocus zoom lens. Together with pan and tilt servos, we build a PTZ camera for the Raspberry Pi with autofocus possibilities. Pivariety: Using Raspberry Pi’s Own ISP Tuning Algorithms with Autofocus CamerasThe Pivariety Project brings Pi’s hardware ISP tuning and camera control algorithms to more camera modules.With better support (AE, AWB, and AF), our autofocus cameras can not only focus faster but also can produce higher quality images/videos than those native camera modules. Suggestions and RecommendationsThat’s everything about how we’ve made autofocus possible on Raspberry Pi cameras. However, here are some of our suggestions: Autofocus is possible but don’t expect it to be as smooth or accurate as a smartphone camera. Arducam’s main goal is to prove the feasibility and offer you more possibilities. It’s OpenCV-based software focus, and it is incomparable to those fancy PD or laser autofocus.An Autofocus example is provided, but we would still recommend that you use the manual control in the software way. We provide another example that allows you to focus the camera in a more intuitive way – by tapping the keyboard arrow keys. It’s more accurate to help you focus on your region of interest (ROI).We’ve only tested our examples on Raspberry Pi OS (Raspbian), so not sure about the other operating systems. However, moof and jneilliii have provided an Octoprint plugin that allows you to control the focus motor, called ArduCamFocus.That being said, here are V1,V2 and HQ Arducam camera modules that support autofocus features. The 5MP V1 and 12MP HQ cameras are a full camera module, and that means you can directly plug its camera ribbon cable into the Raspberry Pi’s CSI slot. The 8MP V2 version is a drop-in CCM replacement, and you need to detach the one on your V2 camera PCB and then attach this one to it. Standard autofocus camera module for Raspberry Pi Arducam 5MP OV5647 1080p Autofocus Camera Module for Raspberry Pi, Compatible with Pi 4/3B+/3 It has an AUTO FOCUS!! Works perfect. Tested successfully on Raspberry Pi zeroW and the 3B+ using Raspian and MotionPi OS. The clarity is amazing because it’s got a micro motor for auto focus that’s total silent. The response time is fast.Paul Keep a couple on handOverall the camera waa great and perfect for my simpler, python based project. The camera is easy to set up. Simply plug the camera cable into the raspberry pi. The camera interfaces quickly and easily with the picamera library and picture has great resolution even under lower light conditions. The auto focus works well as advertised.JMDK Great camera for the moneyI like this camera so much better than the official Raspberry Pi V2 camera!The white balance adjusts automatically (in contrast to the official V2, which has pinkish tint in many environments). There is focus control, but it requires some software (simple code that works over I2C). This is more convenient than mechanical control of the V2, which is not always possible to do if the camera is in a case. And finally, it makes much more sense for the price.Sergey YaryginBetter than the official Raspberry Pi V2 cameraSomething I have found important in object recognition is clarity of the object in the picture. Auto-focus really helps that. I highly recommend this camera if you are learning how to program for A.I..Rich BarthWished I had found this earlier. Arducam 5MP OV5647 1080p Autofocus Camera Module for Raspberry Pi, Compatible with Pi 4/3B+/3 It has an AUTO FOCUS!! Works perfect. Tested successfully on Raspberry Pi zeroW and the 3B+ using Raspian and MotionPi OS. The clarity is amazing because it’s got a micro motor for auto focus that’s total silent. The response time is fast.Paul Keep a couple on handOverall the camera waa great and perfect for my simpler, python based project. The camera is easy to set up. Simply plug the camera cable into the raspberry pi. The camera interfaces quickly and easily with the picamera library and picture has great resolution even under lower light conditions. The auto focus works well as advertised.JMDK Great camera for the moneyI like this camera so much better than the official Raspberry Pi V2 camera!The white balance adjusts automatically (in contrast to the official V2, which has pinkish tint in many environments). There is focus control, but it requires some software (simple code that works over I2C). This is more convenient than mechanical control of the V2, which is not always possible to do if the camera is in a case. And finally, it makes much more sense for the price.Sergey YaryginBetter than the official Raspberry Pi V2 cameraSomething I have found important in object recognition is clarity of the object in the picture. Auto-focus really helps that. I highly recommend this camera if you are learning how to program for A.I..Rich BarthWished I had found this earlier. 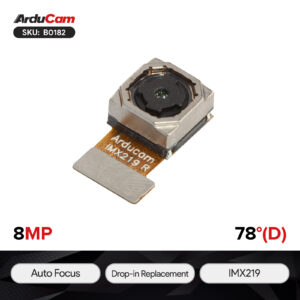 Arducam IMX219 Auto Focus Camera Module, drop-in replacement for Raspberry Pi V2 and NVIDIA Jetson Nano Camera Simple installation and worked without any tweaks.Sharpest focus I’ve seen out of my Raspi cameras to dateRMG good quality itemI setup a bird camera using my raspberry pi and the standard camera was OK, but because it had the fixed focus most of the birds were out of focus. I bought this auto focus camera and with a little programming I was able to improve my pictures. Not all birds are fully in focus (they move too quick) but overall they are much better.There was a little bit of work to setup the hardware and software, but nothing too challenging if you have done stuff with Raspberry Pis in the past.Jeweler24 Nice auto focus camera for my bird boxReplacement for the 5mp camera that had died. Works a peach, very nice image, no night vision but dont require that and easy to install. Made my CR-10 S4 / Octopi very happyAmazon Customer Drop in replacement works better than original Arducam IMX219 Auto Focus Camera Module, drop-in replacement for Raspberry Pi V2 and NVIDIA Jetson Nano Camera Simple installation and worked without any tweaks.Sharpest focus I’ve seen out of my Raspi cameras to dateRMG good quality itemI setup a bird camera using my raspberry pi and the standard camera was OK, but because it had the fixed focus most of the birds were out of focus. I bought this auto focus camera and with a little programming I was able to improve my pictures. Not all birds are fully in focus (they move too quick) but overall they are much better.There was a little bit of work to setup the hardware and software, but nothing too challenging if you have done stuff with Raspberry Pis in the past.Jeweler24 Nice auto focus camera for my bird boxReplacement for the 5mp camera that had died. Works a peach, very nice image, no night vision but dont require that and easy to install. Made my CR-10 S4 / Octopi very happyAmazon Customer Drop in replacement works better than original 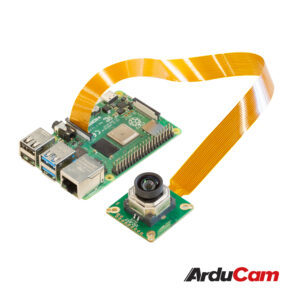 Arducam 12MP 477P Autofocus High Quality Camera for Raspberry Pi Pivariety autofocus camera module for Raspberry Pi Arducam 12MP 477P Autofocus High Quality Camera for Raspberry Pi Pivariety autofocus camera module for Raspberry Pi 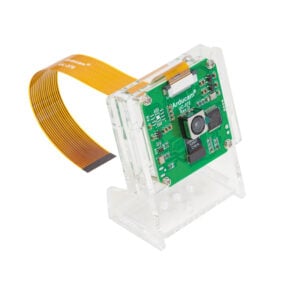 Arducam Pivariety 16MP IMX298 Color Camera Module for RPi 4B, 3B+, 3A+, CM3/CM4 and Jetson Nano/Xavier NX Arducam Pivariety 16MP IMX298 Color Camera Module for RPi 4B, 3B+, 3A+, CM3/CM4 and Jetson Nano/Xavier NX 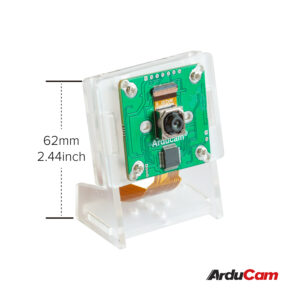 Arducam Pivariety 21MP IMX230 Color Camera Module for RPi 4B, 3B+, 3A+, CM3/CM4 and Jetson Nano/Xavier NX PTZ(Pan-tilt-zoom) Pi camera module Arducam Pivariety 21MP IMX230 Color Camera Module for RPi 4B, 3B+, 3A+, CM3/CM4 and Jetson Nano/Xavier NX PTZ(Pan-tilt-zoom) Pi camera module 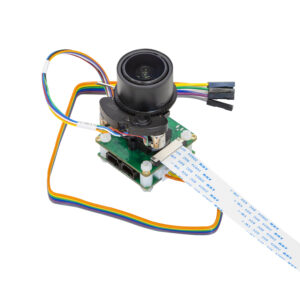 [Discontinued] Arducam 13MP Pan Tilt Zoom PTZ Camera for Raspberry Pi 4/3B+/3, IR-Cut Switchable Camera [Discontinued] Arducam 13MP Pan Tilt Zoom PTZ Camera for Raspberry Pi 4/3B+/3, IR-Cut Switchable Camera 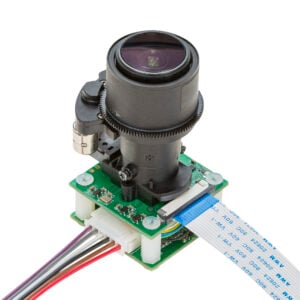 Arducam 5MP 1080p Pan Tilt Zoom PTZ Camera for Raspberry Pi 4/3B+/3 Arducam 5MP 1080p Pan Tilt Zoom PTZ Camera for Raspberry Pi 4/3B+/3 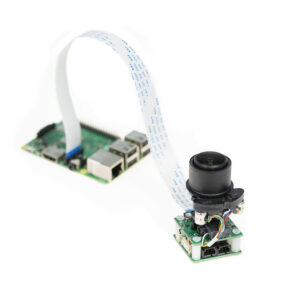 Arducam 8MP Pan Tilt Zoom PTZ Camera for Raspberry Pi 4/3B+/3 and NVIDIA® Jetson Nano/Xavier NX/AGX Orin/Orin Nano/Orin NX Arducam 16MP-AF & 64MP-AF Arducam 8MP Pan Tilt Zoom PTZ Camera for Raspberry Pi 4/3B+/3 and NVIDIA® Jetson Nano/Xavier NX/AGX Orin/Orin Nano/Orin NX Arducam 16MP-AF & 64MP-AF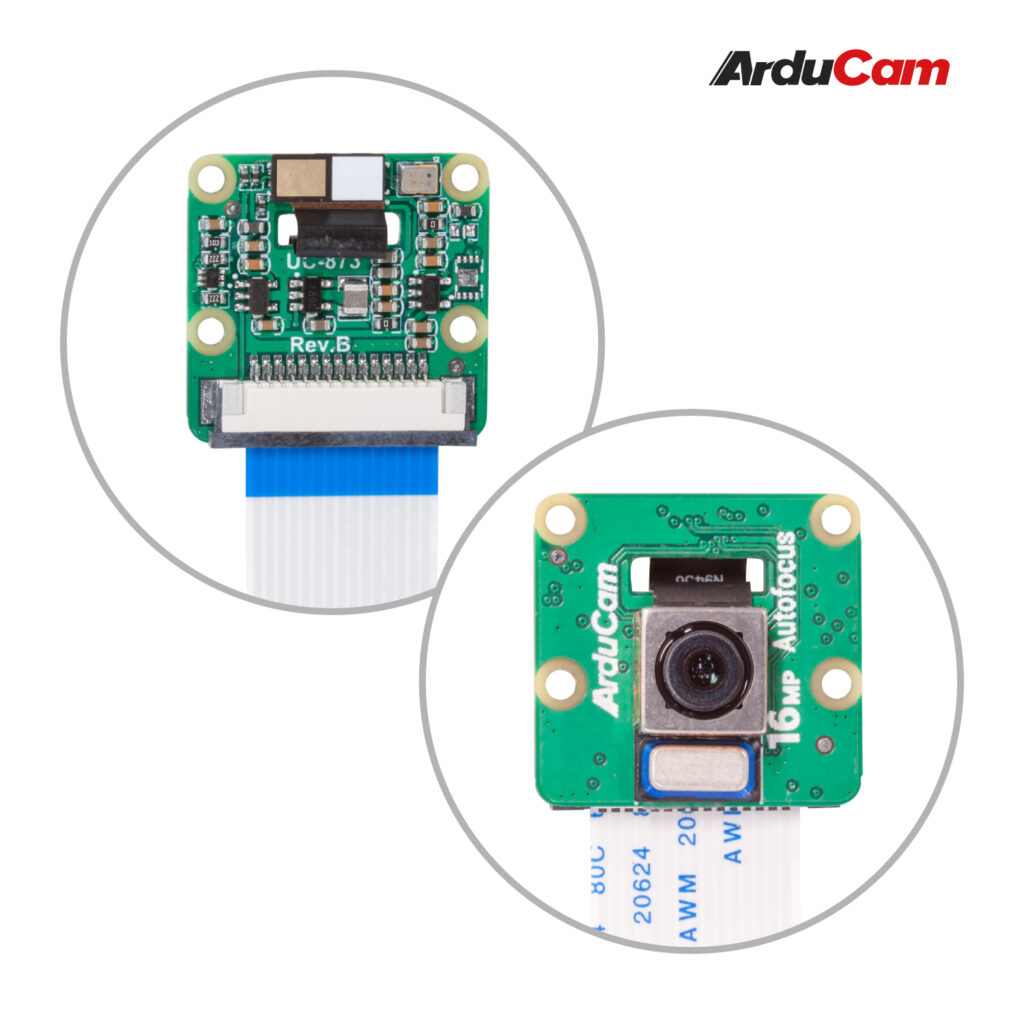 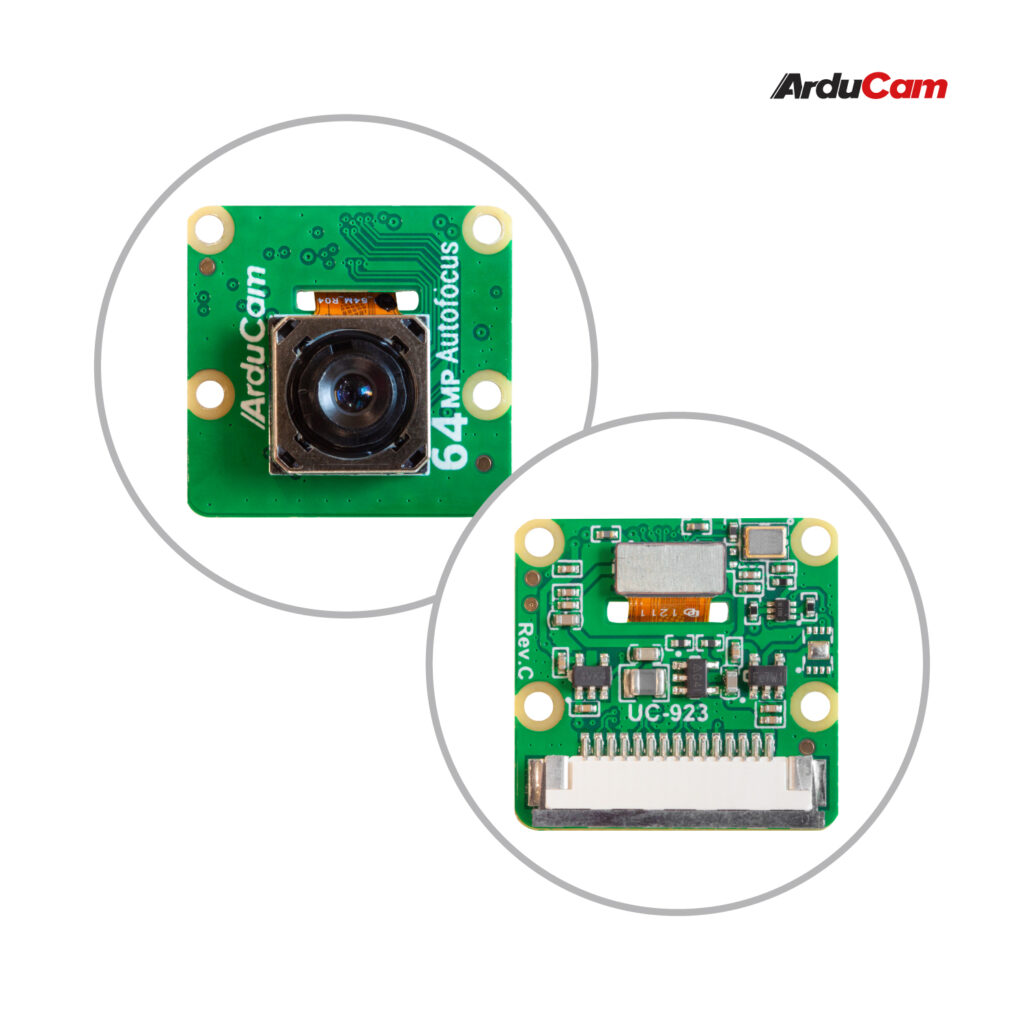 Well, that brings us to the end of this overview. To conclude: The official Raspberry Pi camera modules do not support autofocus, but Arducam has made it possible to achieve autofocus by controlling a focus motor in our customized module via I2C. Why do you need the camera module to do autofocus on Raspberry Pi? Leave your comments below! |
【本文地址】